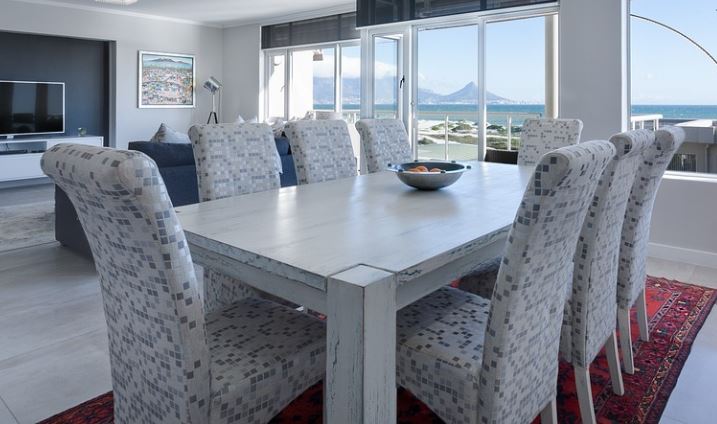
Want to give a worn-out, outdated piece of furniture a fresh look? It can be refinished over the course of a weekend without the use of any specialized tools. Follow the easy instructions below to learn how to refinish a dining room table.
Table of Contents
Shop For Supplies
Purchase all the materials you’ll need before attempting to transform your dining room table or any other wood furniture. You’ll need the following:
- All-purpose cleaning spray and a cloth or paper towels
- 60-, 120-, and 360-grit sandpaper
- A block sander or an orbit sander
- A clean, dry tack cloth
- Stain (or primer and paint)
- Paint and varnish remover (stripper)
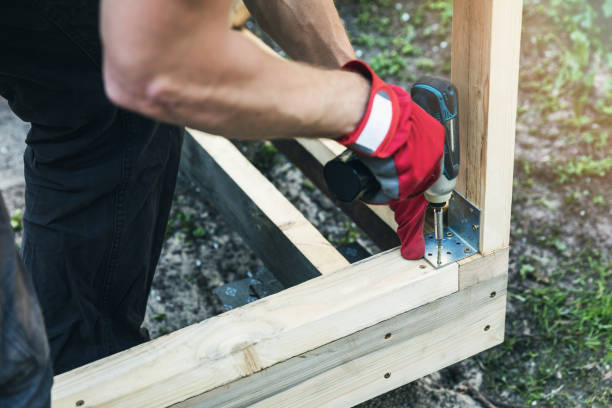
- Putty knife
- Paintbrush
3 Ways Of Refinishing A Table
The First Method
1. Clean the Surface
Cleanse the existing finish of the table by washing it with mild soap and water. This will make the surface ready for sanding if the table is stained, or for stripping if the table has been painted or varnished in the past.
2. Apply Stripper
You’ll need to strip the surface if the table has been painted or varnished. Your neighborhood home improvement store carries a wide range of chemical stripping agents. Regardless of what you use, make sure to follow the manufacturer’s instructions and safeguard yourself from chemical burns by donning the appropriate protective gear, such as chemical-resistant gloves, a long sleeved shirt, and eye protection. A proper ventilation system should be used when working.
In order to soften the existing finish, leave the stripper on for the full amount of time advised by the manufacturer. Then, use a wide putty knife to remove the finish while going against the grain of the wood and at a low angle to the table’s surface to prevent gouging. Between scrapes, clean the putty knife with a cloth.
If the previous finish entered tiny cracks in the wood, it might be necessary to apply a second or third coat of stripper. Use fine steel wool to clean the table after the paint or varnish has been removed.
3. Clean With Mineral Spirits
When you have finished stripping and the surface is dry, wipe it with mineral spirits to get rid of any leftover stripper. Before beginning to sand the table, let it completely dry.
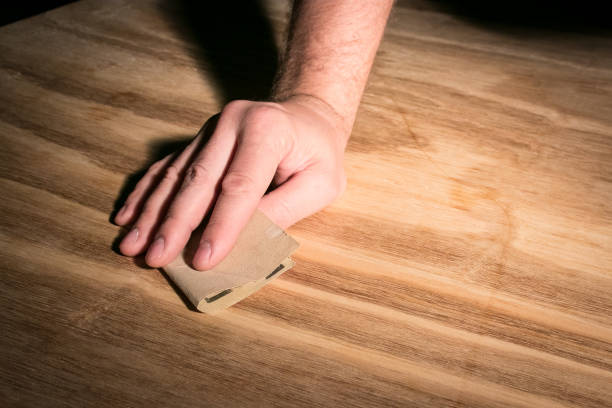
4. Sand Table Surface
To smooth the surface after removing paint or varnish or to remove a stained finish, sand the table while going with the grain of the wood. Be extremely careful not to gouge the surface if you decide to use an orbital or belt sander. Use 100-grit sandpaper for the majority of the initial sanding, then move up to 150-grit and make one last pass with 220-grit to smooth out the grain. You’re happy with the smoothness of the finish.
Utilize a tack cloth to gently wipe away all sanding dust.
5. Apply Stain
Utilizing a disposable brush, apply stain while adhering to the natural grain of the wood. Apply the stain liberally and let it sit for a few minutes before wiping off the excess with a soft cotton cloth (synthetic cloths won’t absorb the stain’s excess) and working the stain into the wood’s minute cracks.
Tip: The wood will turn a darker shade the longer the stain is left on it before being removed with a cloth. Apply stain sparingly at first to ensure that it is removed before it has a chance to set too deeply for an even finish.
Apply the stain in a minimum of two coats. Apply additional coats to achieve the color depth and richness you want. Sand the surface lightly between coats with 220-grit paper (very fine steel wool also works). Note: The wood fibers swell as they absorb the stain during the staining process. Sanding in between coats is necessary to remove swollen fibers and preserve a smooth finish.
6. Apply Finish
Apply polyurethane or tung oil as directed by the manufacturer after the final coat of stain has fully dried (usually overnight or for 24 hours). Since dining room tables are frequently used, apply at least two coats, letting each coat completely dry before putting on the subsequent coat. Apply a cotton rag to a Tung oil finish to buff it. Before using the table, give the final coat of polyurethane or tung oil at least 24 hours to dry.
The Second Method
- To work without worrying about a mess, move the table to a well-ventilated space like a garage or covered porch. Sand the table in the direction of the wood grain, starting with the coarsest (100 grit) sandpaper. Sand the table with the 150-grit paper next, and then finish with the 220-grit paper.
- Use the tack cloth to clean the entire table’s surface. Optional: Use a wood conditioner as directed on the package.
- Following the natural course of the grain, liberally brush the stain onto the table. Just a few minutes of stain soaking into the wood before wiping it clean with a fresh towel. As instructed on the stain’s packaging, let the table dry.
- To achieve the desired color depth, reapply the stain.
- Optional: Use fine 420-grit paper and a hand sander to sand your freshly stained table for an extra-smooth finish.
- For durability, apply up to four coats of polyurethane as directed on the package. A minimum of 24 hours should pass before using the table.
The Third Method
Step 1: Understand Your Wood Table
“Pay attention to the level of detail on the piece before you start,” advises furniture designer Andrew Hamm. “It will become boring to have extremely ornate furniture, he claims. “Avoid pieces with excessive amounts of hand carving, scrollwork, or sharp corners if you’ve never refinished anything.”
Veneer, which is frequently thinner, is not as good a candidate for refinishing as solid wood. Laminate is plastic, so refinishing it won’t help. Hamm advises examining the wood’s grain if you’re unsure of the type of wood surface you’re working with: “It is veneer if the pattern repeats across the width of the grain because a single log was rotary-sliced to create the sheet.”
Step 2: Clean Your Wood Table
Lack of adequate time set aside for cleaning or surface preparation is the biggest error newcomers in refinishing make. If there is any dirt, oil, or grease on the table, get rid of it completely before you remove the current finish. If not, the sanding process will result in the debris being ground into the wood. Use common cleaning products, such as an all-purpose cleaner.
Step 3: Strip The First Finish
You have a few options when it comes to the old finish. To remove the original coats of paint or stain, you can use a chemical stripper; just make sure you follow the correct instructions on the product label. Generally, you should work in a well-ventilated area while donning long sleeves and rubber gloves. Use a putty knife or scraper to remove the first finish after the stripper has softened it. In order to make the surface of the table as smooth as possible, sand it down later with 80- to 120-grit sandpaper.
WATCH
3 Hour DIY Bedroom Makeover By Pro Designer
Alternately, sand the table’s original top coat off using coarse paper. Sand in the direction of the grain starting with the 60-grit roughest sandpaper. Although a mechanical sander can be used instead of a hand sander, the process is much more streamlined. In order to polish the wood, finish by dust-free wiping the table with a tack cloth. Next, resand the surface with your 120-grit sandpaper.

Step 4: Apply Paint Or Stain—or Nothing
“After removing everything from raw wood, Hamm declares, “I’ll go straight for an oil.” “Reapplying furniture oils in the future will bring out the rich colors in the wood without making it shine, as they penetrate the wood and protect it below the surface.” For finishing purposes, use tung or Danish oils, teak oil for denser woods, or both. Find a stain you like if you don’t like the wood’s natural color. Spot refinishing isolated damage or a chipped section is not a good way to save time: “No stain will ever look as old as your grandmother’s walnut table did after 60 years of aging in the dining room’s sunlight, according to Hamm.
When staining, use a wood conditioner to prepare the surface so that it will absorb the stain; this will help you achieve a uniform finish.
After wiping everything down, apply one coat of stain in the direction of the wood’s natural grain using a paintbrush. After allowing it to dry, gently sand any bumps or lint with 360-grit sandpaper, then dust it off. The depth of color you want will determine how many coats you should apply. If you’re priming and painting, sand the primer coat as soon as it’s fully dry, and then proceed with painting. For a piece of furniture that receives a lot of use, like a dining table, Hamm cautions that paint isn’t as long-lasting as an oil treatment.
Step 5: Finish
When you use oil to refinish a table, you’re done. For painting and staining projects: Hamm advises using a clear coat to increase durability; look for polyurethane or polycrylic, both of which need two coats. Sand with fine-grit paper in between coats. Once your antique coffee table has been restored to like-new condition, decorate it as you please.
How Much Does Refinishing A Table Cost?
Refinishing a wood table or other wooden piece of furniture only costs you time if you already have the necessary tools (see above). Expect to spend about $60 at your neighborhood hardware store buying supplies if you don’t already have them.
Can You Paint Over Varnished Wood Without Sanding It First?
The answer is yes; use TSP, which you can find at your neighborhood hardware store. Apply the solution, then wash it off and let it air dry completely. After priming, paint your furniture as you like. Avoid skipping the priming step to prevent the wood grain from showing.
Is Refinishing Furniture Possible Without Sanding?
Yes, as long as you’re not staining it. Some paints can adhere to stained or painted furniture without needing to be sanded. Consider using mineral paint, chalk paint by Annie Sloan, or milk paint like Miss Mustard Seed’s Milk Paint. Alternately, use a primer of high caliber that is marked “no sanding.”
A liquid deglosser, also known as liquid sandpaper, can be used to sand down the wood’s surface and remove paint or finishes. It’s best done outside or in a space with good ventilation because it does smell.