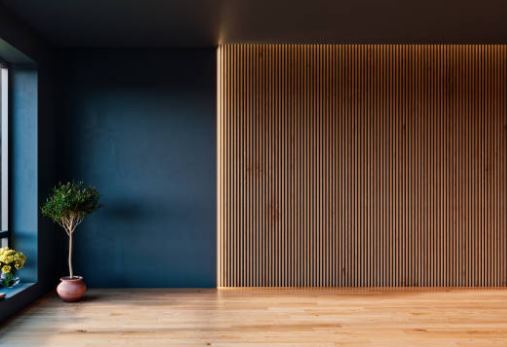
Wood slats installed on a wall give a space a refined appearance. It has a mid-century modern style that is frequently seen in upscale hotels or designer residences. It stands out even more because it’s not a characteristic you typically find in houses. The perfect focal point for a space is a wood slat accent wall, which you can enjoy for many years to come.
Table of Contents
Basics of Installing Wood Slats on a Wall
A wood slat wall is constructed from vertical wood strips that are spaced uniformly and run from the floor to the ceiling. A wood slat can range in width from 1/2 inch to 2 inches. You can choose the wood slats’ width based on the final appearance you want to achieve. Wood slats are typically more on the narrow side.
In general, the distance between each wood slat should be between 1/4 and 1/2 inch. The distances between the slats ought to be smaller than the width of the slats to prevent the appearance of zebra stripes.
Because the wall behind the slats serves as their background, its color has a significant impact. For a dramatic, contemporary look, you might want to go with a dark background, like matte black.
Dimensional Lumber Slats
- One-by-two lumber strips
- $150 to $300 per 8 linear feet
- Requires a miter or circular saw, not a table saw
- Faster process
- Thicker wood slats
Sheet Good Slats
- Large sheets of plywood that you cut into slats
- $40 to $60 per 8 linear feet
- Requires table saw, plus miter or circular saw
- Time-intensive
- Thinner wood slats
Building With Dimensional Lumber
The project is expedited and you can avoid using a table saw by using pre-cut, one-by-two wood strips. Cutting the ends of the boards and nailing them together take up the majority of the work.
In actuality, one by twos measures 1-1/2 inches wide. The number of strips needed to cover an 8-foot section of wall with a 3/4-inch space between the boards is 48. Using a spare slat held on the edge as a spacer for the next slat saves time and ensures a cleaner appearance. Alternately, if you prefer a different width, use blocks that have been cut to the same distance apart all along the wall.
Even though softwood strips are cheap, the cost of the slat wall can still be high if you need to purchase 100 or 200 strips. The cost of hardwood strips is three times that of softwood, but they need less finishing.
Building With Sheet Goods
The more economical method involves spending more time and money to cut a 4-foot by 8-foot sheet of plywood into strips. Around 90 to 92 1/2 inch wide strips can be produced from one sheet of plywood.
When comparing sheet goods and dimensional lumber, thickness is one key distinction. Use nominal 1/2-inch plywood (which is about 3/8 inch thick) if you want the slats to hug the wall closely. The strips would be 3/4 inch thick if they were made of dimensional one-by-two lumber.
Safety Considerations
It is already risky to use a table saw or circular saw, but the danger increases when cutting repeatedly. Always be on the lookout. By pushing from a distance or with a push block or push stick, you can keep your hands away from the blade. Large sheets can be challenging to push through a table saw; therefore, cut with a helper holding the other end.
Tools and Materials You’ll Need?
Equipment / Tools
- Table saw
- Electric miter saw
- Cordless finish nailer
- Eye and hearing protection
- Putty knife
- Heavy gloves
- 220 grit sandpaper
- Laser Level
- Tape measure
Materials
- Plywood sheets or dimensional lumber slats
- Black matte interior paint
- Wood filler
- Construction glue
12 Easy Ways to Install Wood Slats
There are twelve easy ways listed below.
Inspect Wall
Check for levelness in the wall’s surface. With drywall joint compound, small gaps can be filled, but excessively waved walls might not be a good fit for this project.
Plan Wood Slat Wall
Determine how much wood to purchase based on the strip and spacing widths. The wood slats must be positioned around outlets and light switches unless you intend to relocate them. Plan on leaving a border of about 1/2 inch all the way around the faceplates.
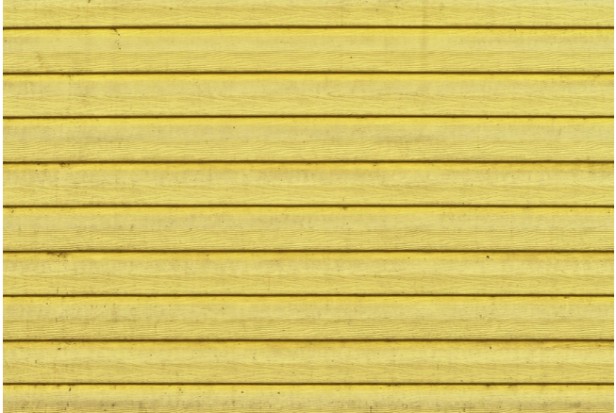
Both vertical and horizontal slat walls can be built. The only difference between the two wall construction methods is the length and placement of the slats. Both require the same materials and procedures.
Slat walls that are vertical give the impression that the walls and ceilings are higher than they actually are. Horizontal slat walls are a good choice for smaller rooms or hallways because they have a tendency to make a space appear spacious.
Paint the Wall
In order to contrast the wood slats, paint the wall the chosen color. Using two coats, roll out the paint. You can apply the second or additional coats of matte or flat paint within 30 to 45 minutes of the first coat has dried.
Rip Wood Slats (Sheet Goods Only)
In order to create individual slats, sheet goods must be ripped, or cut lengthwise. Skip this step if you’re using dimensional lumber slats that are already pre-cut.
To cut 1/2-inch-wide slats or the desired width, feed the plywood lengthwise through the table saw. As the saw gate may become looser over time, periodically check the strip width to ensure that it is uniform.
Tip
Try different combinations of slat width and slat spacing to find the one that best suits your preferences.
Fill Large Voids
The plywood’s sides may occasionally have tiny voids or holes. Add wood filler to these gaps and smooth them out with the putty knife.
Sand Wood Slats
Sand each wood slat separately while putting on thick gloves. To remove stray splinters, lightly run the slat up and down while holding the sandpaper in your hand. Try to smooth out the roughest spots because plywood’s layered sides are difficult to sand down smoothly.
Paint Or Stain Wood Slats
Wood slats should be laid out. The wood slats should be painted or stained on the front, both sides, but not the back. Avoid large drips on the back that will harden and keep the slats from laying flat against the wall.
Cut Ends of Wood Slats
Measure the first slat’s height from floor to ceiling beginning at one corner. To account for the expansion and contraction of the wood, the slat should be the distance from the floor to the ceiling, minus 1/4 inch.
Tip
Since floor-to-ceiling heights typically differ across the width of a wall, measure and cut each slat individually.
Install Wood Slats
Place a bead of construction glue along the first slat’s length from the backside. Start by putting in the first wood slat in a corner. Use the plumb function on the laser level or a bubble level to position it vertically. Put a nail through the slat.
Since the majority of the slats will be fastened to drywall with nails, angling the nails will aid in better holding the slat in place while the glue sets.
Tip
To prevent squeezing out extra glue after the slats are nailed to the wall, keep the glue beads narrow and in the middle of the board.

Cut Around Obstacles
Cut the slats around any obstacles you encounter with the miter saw.
Fill Nail Holes on Slats
Put wood putty in the nail holes after all of the slats have been installed.
Touch Up the Slats
If necessary, touch up wood slats with a brush for paint or a rag for stains.
Conclusion About Wood Salts Wall
Board and Batten is a type of wainscoting that has alternating wide boards and narrow wooden strips called “battens.” On interiors or exteriors, board and batten can be installed vertically or horizontally. It gives a plain wall value and a really nice modern appearance.