Painting is the quickest and simplest way to refinish a wood table. However, if the item is sturdy and made of solid wood, you might want to think about restoring it to its original state.
It’s not hard to learn to refinish a wood table, and just about any DIYer can do it. These seven steps can help you refinish a wood table so that it looks its best, whether your project involves restoring family heirlooms to their former splendor or refinishing end tables from the thrift store.
Table of Contents
What Are Materials and Supplies?
- stripper & putty knife (if the table is painted or varnished)
- oil-based stain
- oil-based polyurethane or Tung oil
- 100-, 150- and 220-grit sandpaper
- fine steel wool
- disposable stain brushes
- cotton rags
- tack cloth
- orbital or belt sander (optional)
- chemical-resistant rubber gloves
- long-sleeve shirt
- splash-proof goggles (or similar eye protection)
- mineral spirits
How to Refresh a Wood Table?
Just follow the easy seven steps to refinish a wood table.
1. Understand Your Wood Table
Furniture designer Andrew Hamm cautions to “pay attention to the level of detail on the piece before you start. “Super ornamental furniture is going to be tedious,” he says. “Avoid refinishing a wood table with too many hand-carved details, scrollwork, or sharp corners if you’ve never done it before.”
In comparison to veneer, which is typically thinner, solid wood is a better candidate for refinishing. Laminate is made of plastic, so refinishing it won’t work. If you’re not sure what kind of wood surface you’re working with, Hamm recommends looking at the grain of the wood: “It is veneer if the pattern repeats across the width of the grain because a single log was rotary-sliced to create the sheet.”
2. Clean the Surface
To clean oil and dirt from the table’s current finish, use mild soap and water. If the table is stained, this will get the surface ready for sanding; if the table was painted or varnished previously, this will get the surface ready for stripping.
3. Apply Stripper
You must strip the surface if the table has been painted or varnished when you refinish a wood table. Your neighborhood home improvement store carries a variety of chemical stripping agents. Whatever you choose to use, make sure to follow the manufacturer’s instructions and safeguard yourself from chemical burns by donning the appropriate protective gear, such as chemical-resistant gloves, a long-sleeved shirt, and eye protection. Additionally, be sure to work in a space with adequate ventilation.
Before removing the existing finish with a wide putty knife and going against the grain of the wood to avoid gouging the table’s surface, leave the stripper on for the duration advised by the manufacturer to soften the existing finish. Between scrapes, use a cloth to clean the putty knife.
If the previous finish entered tiny cracks in the wood, it might be necessary to apply a second or third coat of stripper. Apply fine steel wool to the table after the paint or varnish has been removed.
Clean With Mineral Spirits
When you’re finished stripping and the surface is dry, wipe it with mineral spirits to get rid of any leftover stripper. Before beginning to refinish a wood table, let it dry completely.
Sand Table Surface
To smooth the surface after removing paint or varnish or to remove a stained finish, sand the table while going with the grain of the wood. Be extremely careful not to gouge the surface if you decide to use an orbital or belt sander. Use 100-grit sandpaper for the majority of the initial sanding, then move up to 150-grit and make one last pass with 220-grit to smooth out the grain. Finish in a pleasingly smooth manner.
Utilize a tack cloth to gently wipe away all sanding dust.
Apply Stain
Utilizing a disposable brush, apply stain while adhering to the wood’s natural grain. Apply the stain liberally and let it sit for a few minutes when you refinish a wood table. Wipe off any extra stain with a soft cotton cloth (synthetic cloths won’t be able to absorb excess stain), then use the cloth to rub the stain into the wood’s tiny cracks.
Tip: The final color will be darker the longer stain is allowed to remain on the wood before wiping. Apply stain sparingly at first so you can be sure to wipe it off before it has a chance to soak in too much for an even finish.
Apply the stain in a minimum of two coats. Apply additional coats to achieve the color depth and richness you want. Between coats, lightly sand with 220-grit paper (very fine steel wool also works) and clean with a tack cloth. Note: The wood fibers swell as they absorb the stain during the staining process. To maintain a smooth surface, it is necessary to sand between coats to break down the swollen fibers.
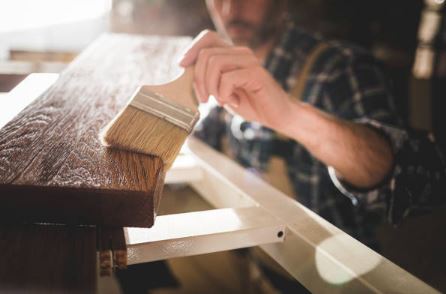
Apply Finish
Apply polyurethane or tung oil in accordance with the manufacturer’s instructions after the final coat of stain has completely dried (usually overnight or for 24 hours). Given how frequently dining room tables are used, apply at least two coats, allowing each to completely dry before moving on to the next. A cotton rag should be used to buff a Tung oil finish. Prior to using the table, let the last coat of polyurethane or tung oil dry for at least 24 hours.
Do you grasp the seven easy ways to refinish a wood table?